WebSocket Application
A Simple WebSocket Application in Lolo Code
A webSocket is mainly used to create real-time applications, such as chat apps, collaboration platforms and streaming dashboards. These applications take advantage of two-way/bidirectional communication between a server and users’ browsers.
Using Lolo for applications that are reliant on websockets is ideal. The platform doesn’t require initialisation before the function executes so you don’t pay a price for waking up a container. You also have access to a baked in key / value store which means that you don’t end up loosing state between subsequent invocations. I.e. you can store data within the Application, you don't have to start from a blank slate on every invocation.
We’ll demonstrate something very simple here by using a pre-made Websocket Trigger to connect and broadcast all messages to all connected clients. You can create your own Websocket Trigger by extracting httpServer from the context (ctx) but it is not necessary for you to understand how the Websocket Trigger functions for you to work with this in Lolo.
Add the WebSocket Trigger
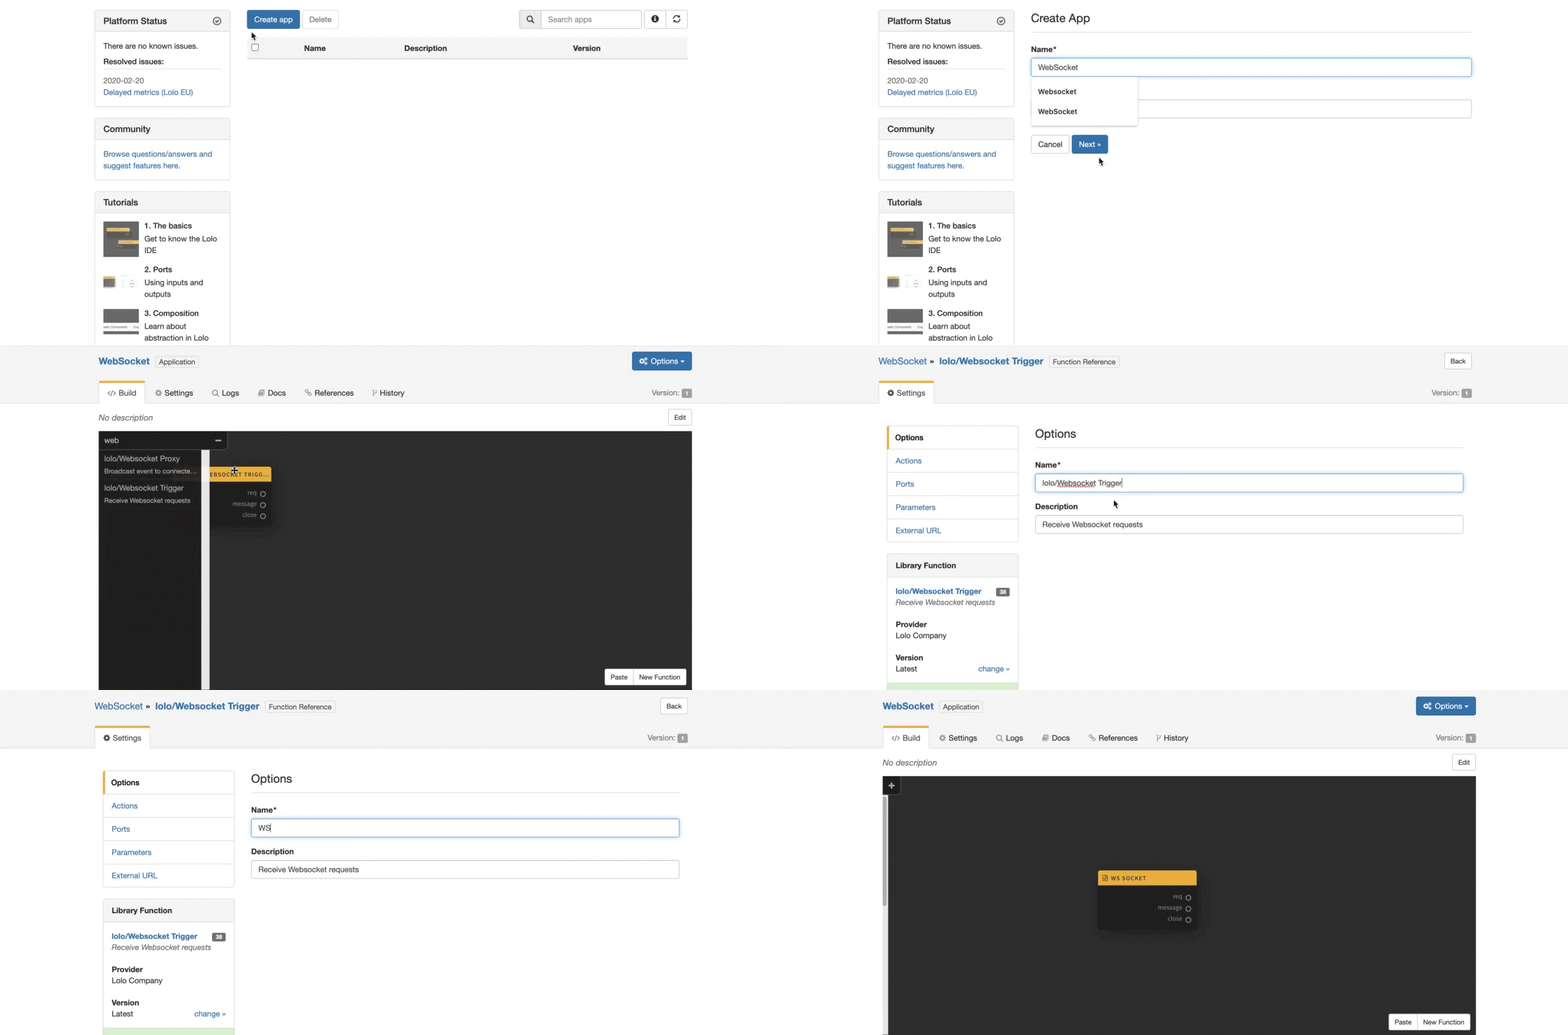
To begin, we need to set up a new websocket server that can handle inbound websocket requests from clients. We do this by first creating a new application and then adding the lolo/Websocket Trigger from the Functions Gallery on the left of the graph. Add in a path name, such as /socket. You can also rename it.
Process Incoming Request
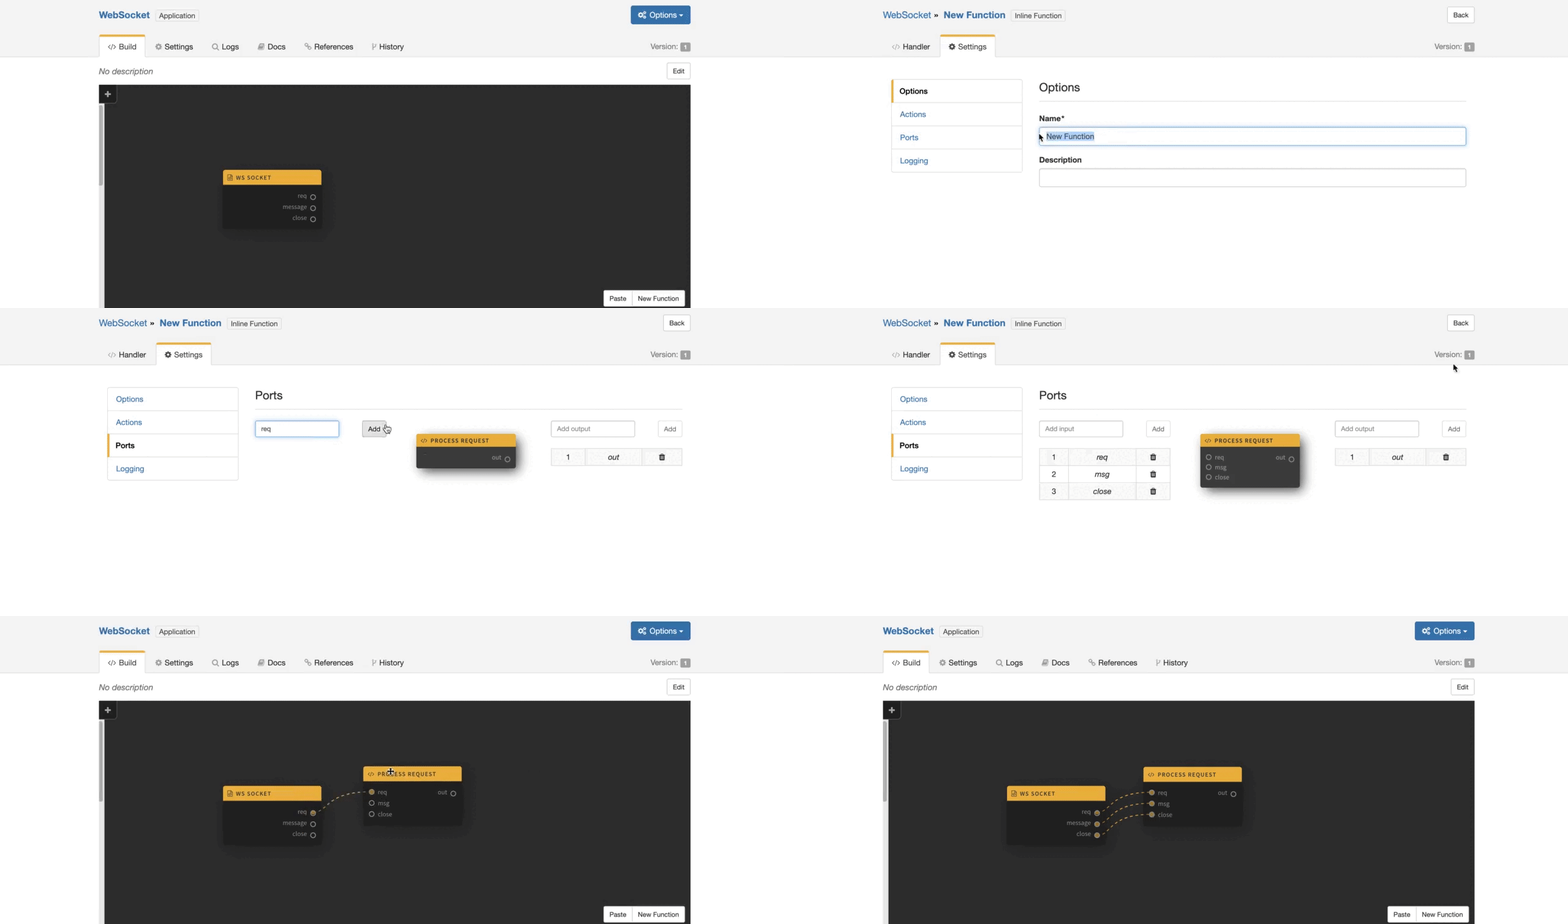
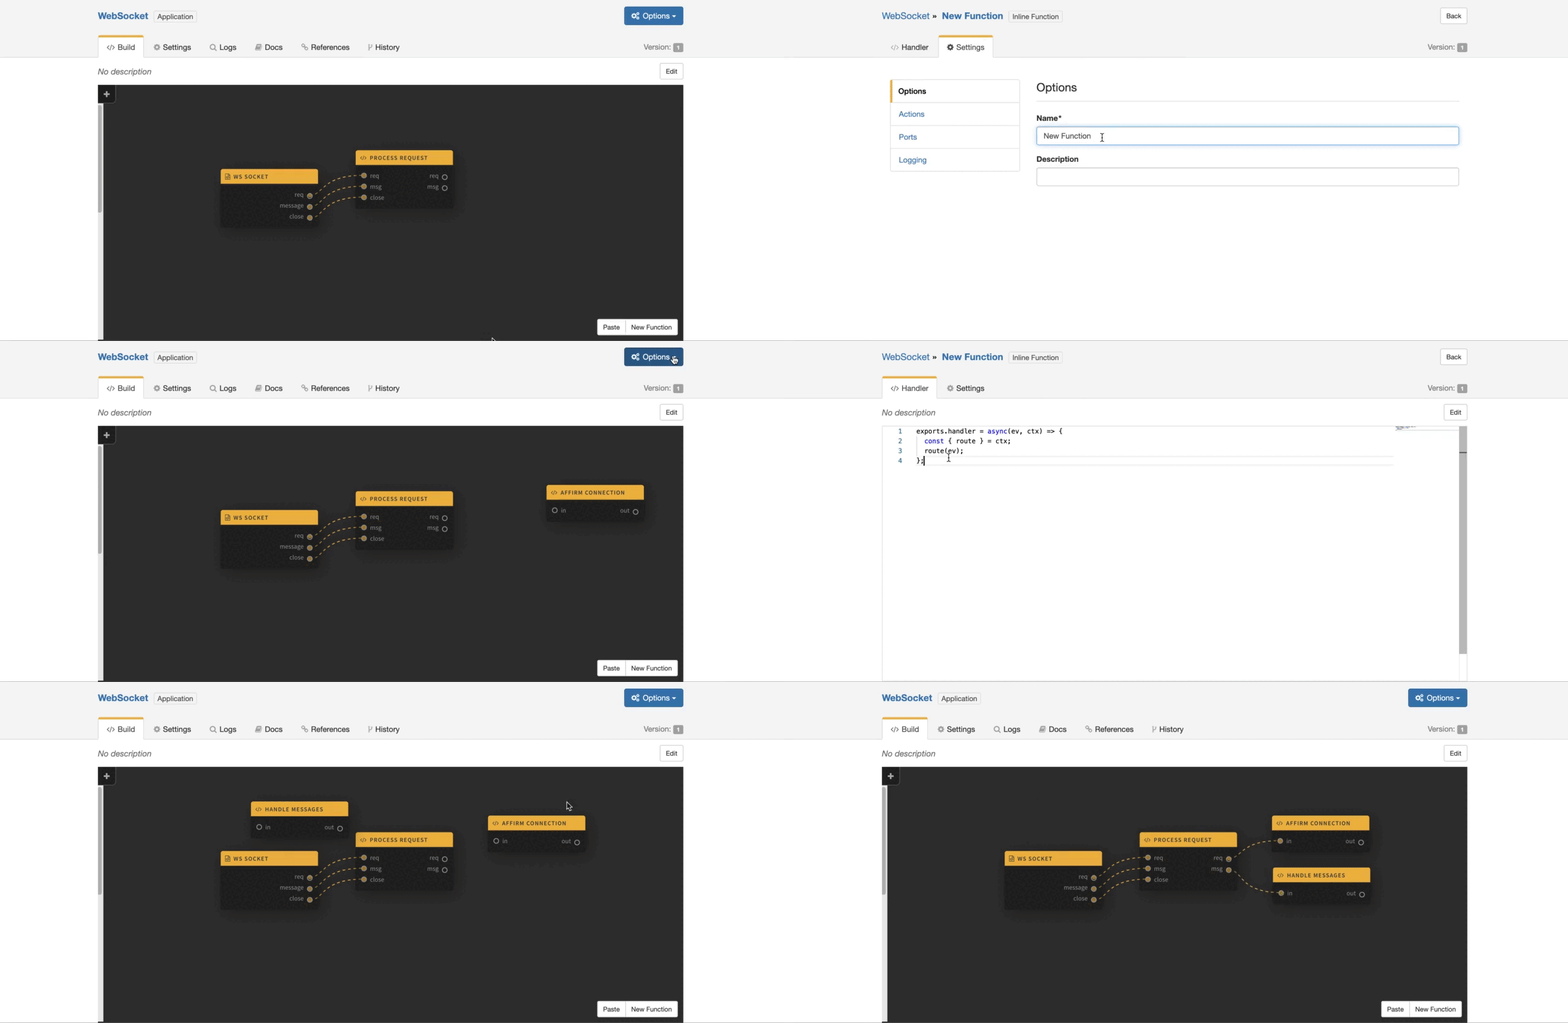
When you add this WebSocket Trigger you get three output ports called req, message and close so you need to setup ways to process these requests. Add another inline Function and name it 'Process Request.' Remove the in port and instead add in three in ports called req, msg and close.
Link the ports to the right in and out ports with the nodes, look below for an illustration.
We need a bit of code to do something here with the websocket connection. Copy and paste in the code from below exactly as is in the code editor of the new Function you just created.
const connections = {};

exports.handler = async (ev, ctx) => {
  const { route, input, inputs, log, emit } = ctx;
  const { sessionId } = ev;

  // check incoming port (i.e. req, message or close)
  switch (input) {

    // on first connection
    case inputs.req:
      connections[sessionId] = {
        send: body => emit('response', { body }),
        end: () => emit('response', { end: true }),
        info: ev.headers
      }
      ev.body = { connected: true, yourConnectionId: sessionId };
      // re-route data to 'req' output port
      route(ev, 'req');
      break;

    // on subsequent messages
    case inputs.msg:
      // re-route data to 'msg' output port
      route({ connections, message: ev.message, sessionId }, 'msg')
      break;

    // when client disconnects
    case inputs.close:
      log.info("client has disconnected");
      delete connections[sessionId];
      break;
  }
};
The code above is checking what ports the incoming data is routed through, giving us a way to handle a new connection by adding it to connections. We are also setting up how we want to handle subsequent messages and a disconnecting client by using the in ports, msg and close.
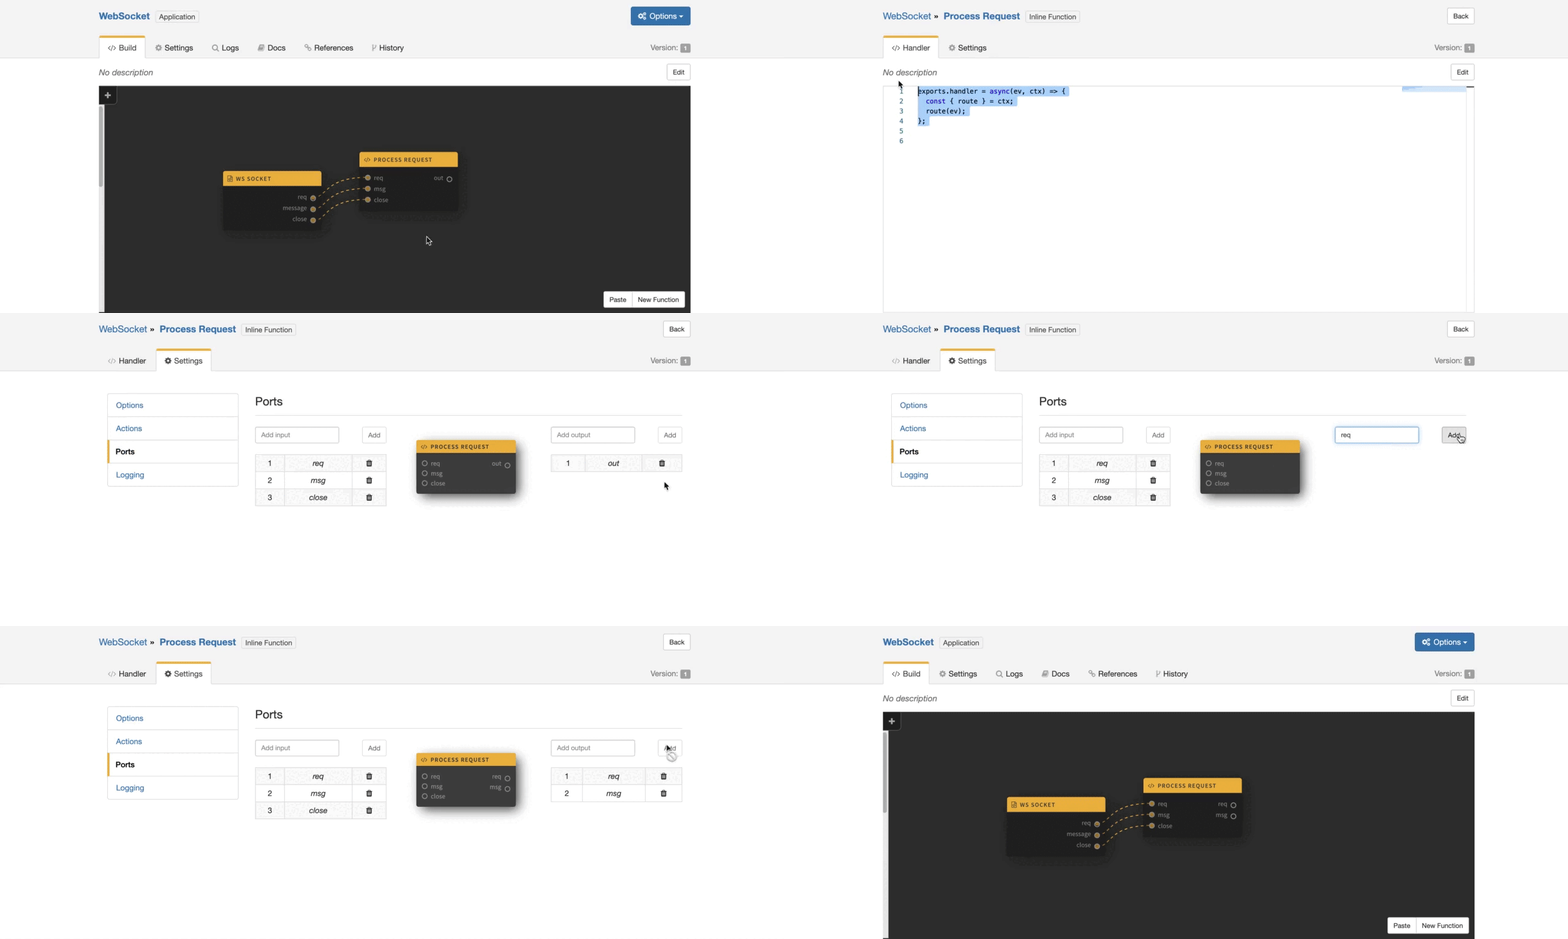
This code above though is re-routing to other nodes via the route() method as well. As you can see we have two output routes here to 'req' and 'msg.' We thus need to add those two output ports as well.
Send back a response
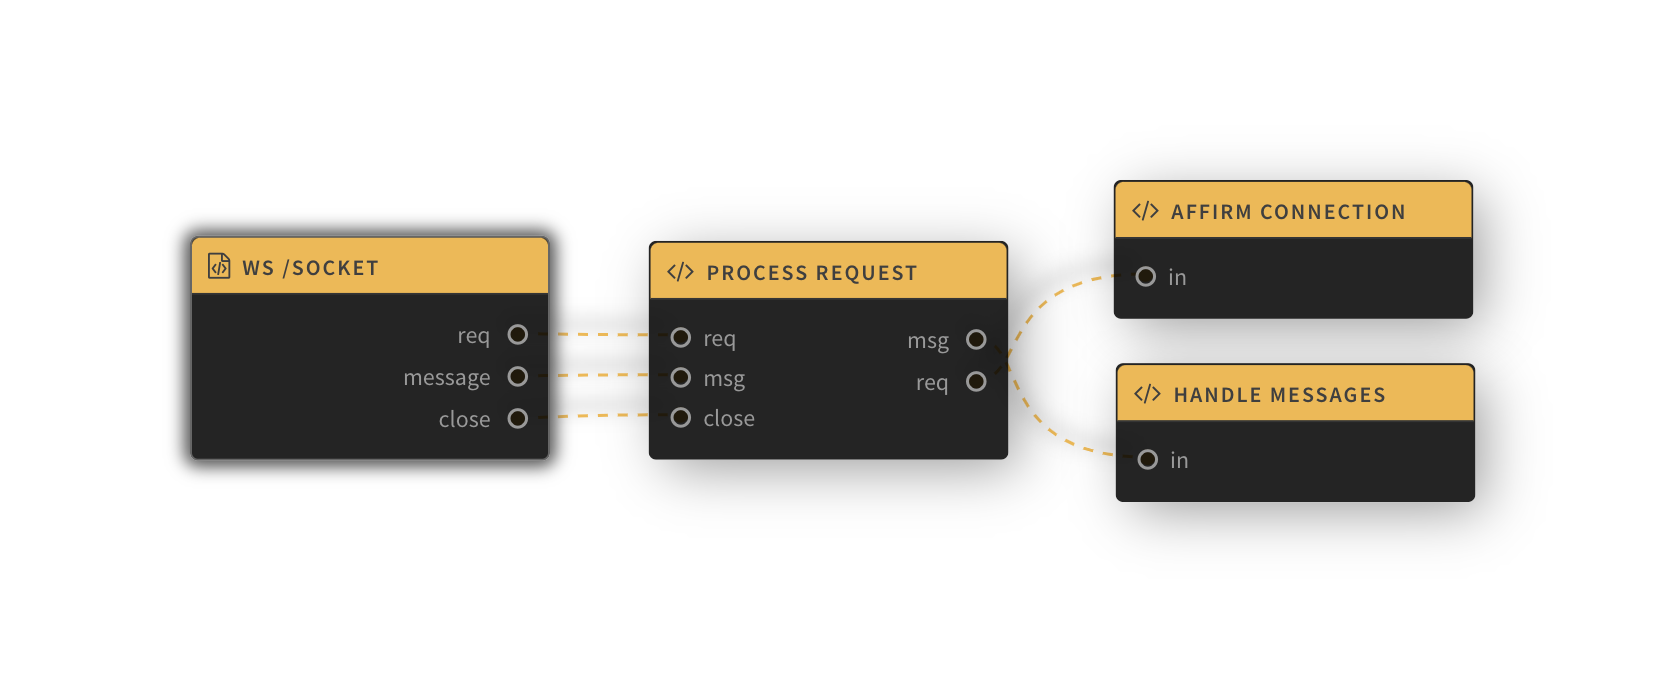
Now we have two outports in the Process Request Function that needs to go somewhere, so we create another inline Function called Affirm Connection and paste in the code below. All this does is signal the listener within the WebSocket Trigger to send a response to the client. We will route the req route to this node.
exports.handler = async(ev, ctx) => {
  const { emit, log } = ctx;
  // Log to the console that a client has connected
  log.info("client has connected");
  // send response to the client
  emit('response', ev);
};
Along with this we also need a way to handle subsequent messages. In this case we said we would broadcast all messages to all clients when someone sends something. So, create another inline Function and call it Handle Messages. Paste in the code below, see comments to understand what it does.
exports.handler = async (ev, ctx) => {
  // extract connections, and current session id from the event data
  const { connections, sessionId } = ev;
  // send messages
  await broadcastToAll(ctx, connections, sessionId, ev);
};

const broadcastToAll = async ({ log }, connections, currentSessionId, ev) => {

  // loop through connections
  Object.keys(connections).forEach(sessionId => {
    try {
        // send message to everyone but the current sessionId
        if (currentSessionId !== sessionId) {
        connections[sessionId].send(`${sessionId} says: ${ev.message}`)
        }
    } catch (e) {
      log.error(e)
    }
  })

};
You can remove the out ports for both of these new Functions. Now we also have to route the data visually from the Process Request node to the other two nodes we've created.
Save and Deploy
Alright, that was it. You can save and deploy. Look in the Logs for the 'Listening to port 4000' message to see if it is ready to use. Now go into the WebSocket Trigger to collect the External URL. We are going to use it to connect to this Websocket.
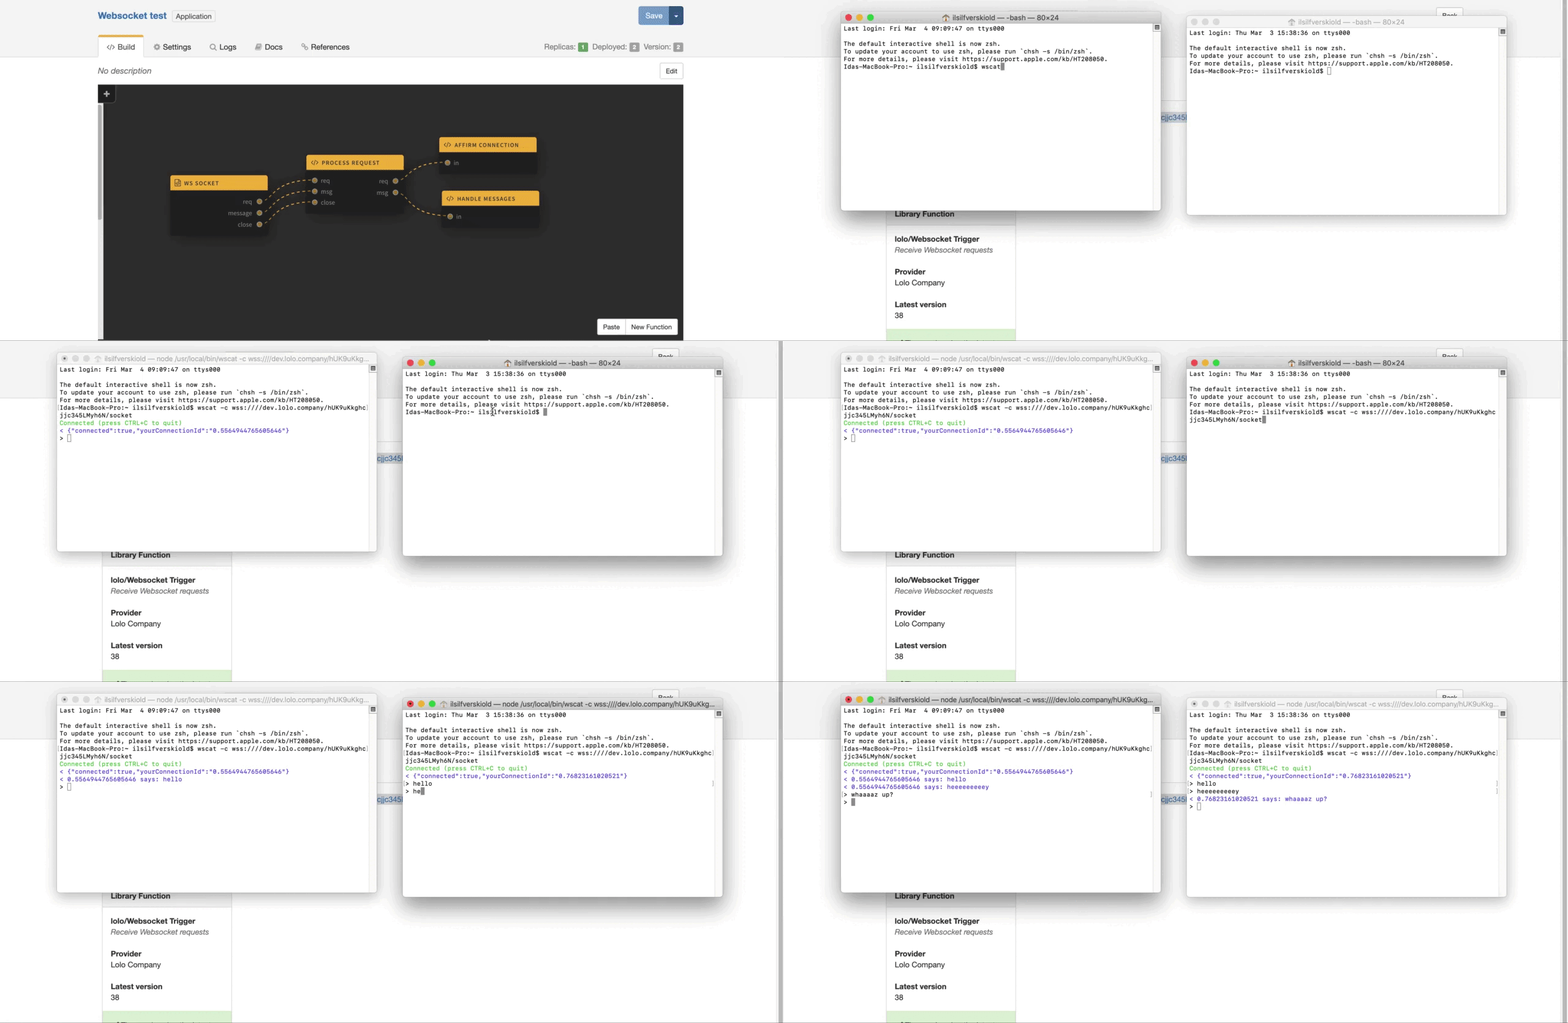
Open two terminals on your computer and then connect via wscat.
wscat -c wss://eu-1.lolo.co/:appId/socketRemember to npm install wscat -g first if you don't already have wscat installed.
Adding Lolo Authentication
Updated 3 months ago
