CRUD API V3
Lolo's CRUD API v3 Library Function
Here we will demonstrate how to use the Lolo/CRUD API v3 Library Function to build your own CRUD API in a few minutes without the need for an external database. We're taking advantage of Lolo's state here. This library function has been built by the Lolo team but you may create your own library functions.
As for the library function itself, you'll be able to configure it to set a path for your endpoint, add a JSON schema, tweak allowed actions and add in Lolo authentication & authorization.
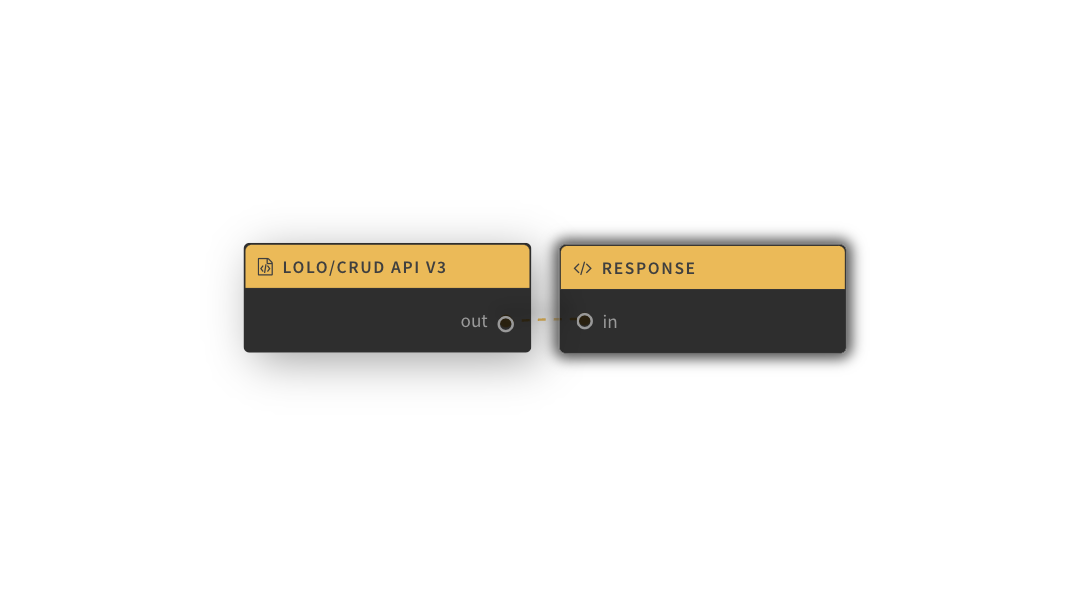
Your Lolo workflow will look like the example above and should be very simple to set up.
As the code has already been built for you in the Lolo/CRUD API v3 Library Function, this application will need very little code. The Lolo/CRUD API V3 node sets up your methods (GET, POST, PUT, PATCH and DELETE) and your database. The response is sent back from the Response node by the use of emit(). See the workflow illustration above.
Don't worry if this is jibberish to you. Just follow the steps below to get this up and running.
Getting Started
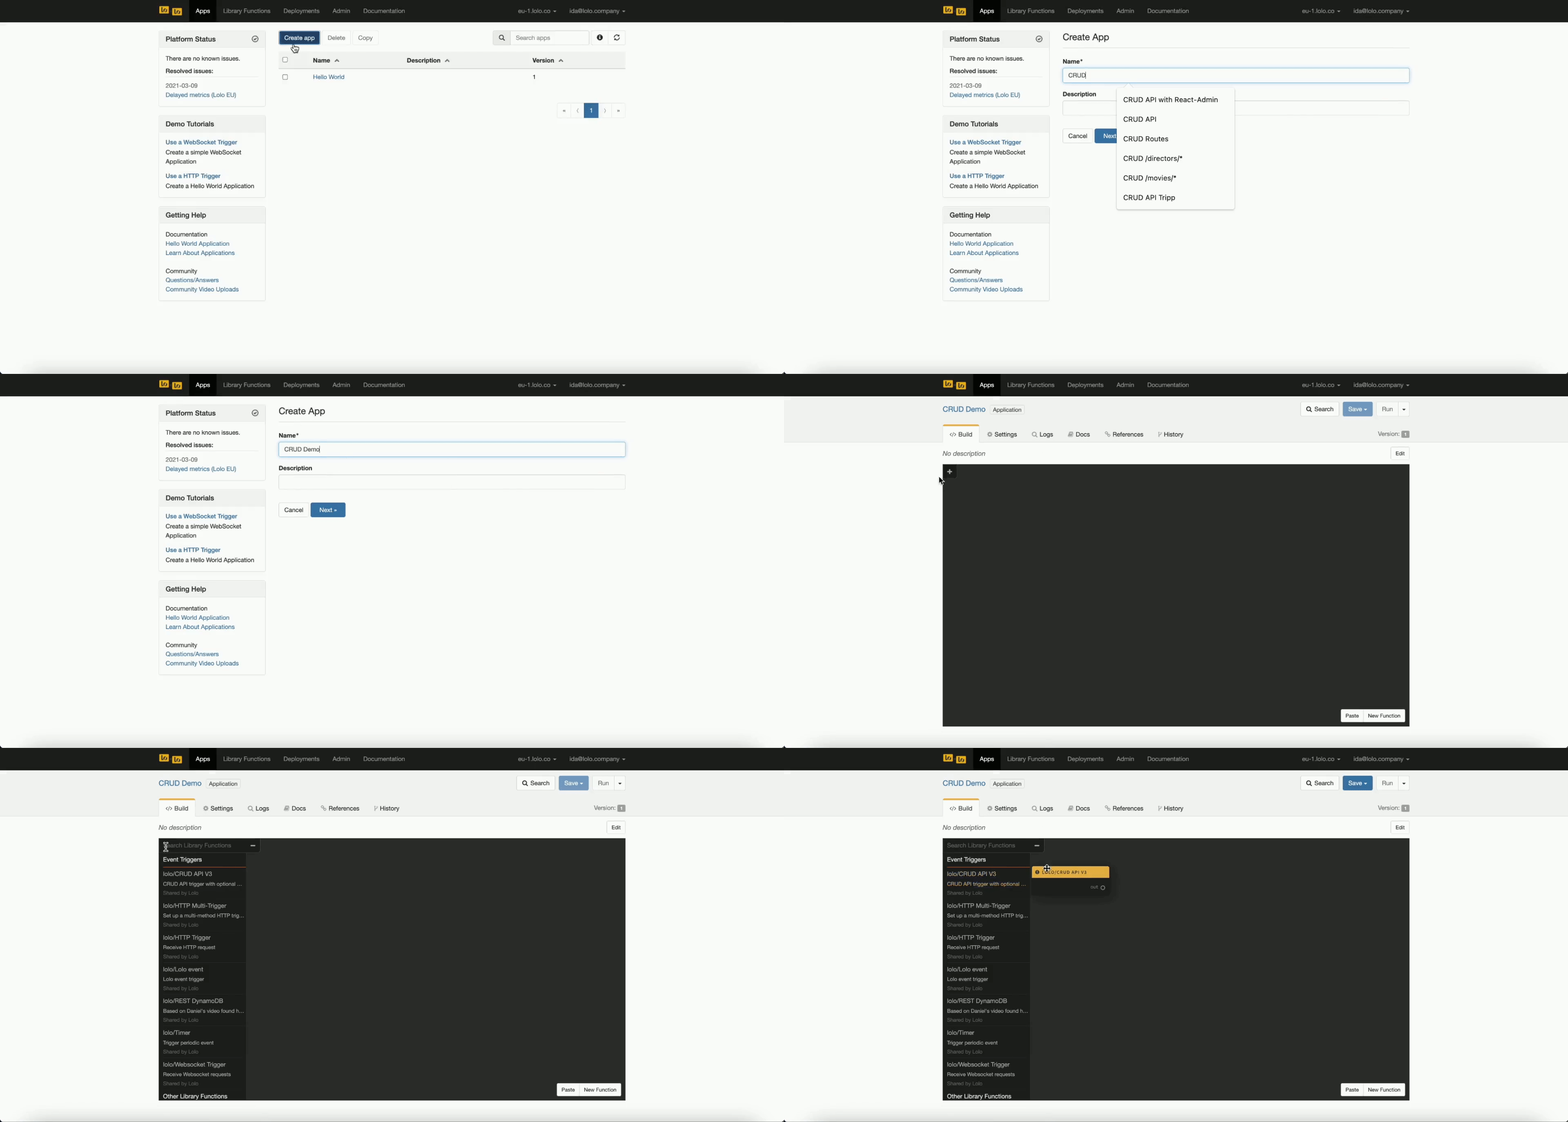
Create a new application in your Lolo account. If you do not have an account you can sign up for free here.
Once you have created a new app, clicking on the plus (+) sign to the left of your graph, you'll have access to a few library functions you can work with. Add in the lolo/CRUD API v3 function by clicking on it.
Configure the Library Function
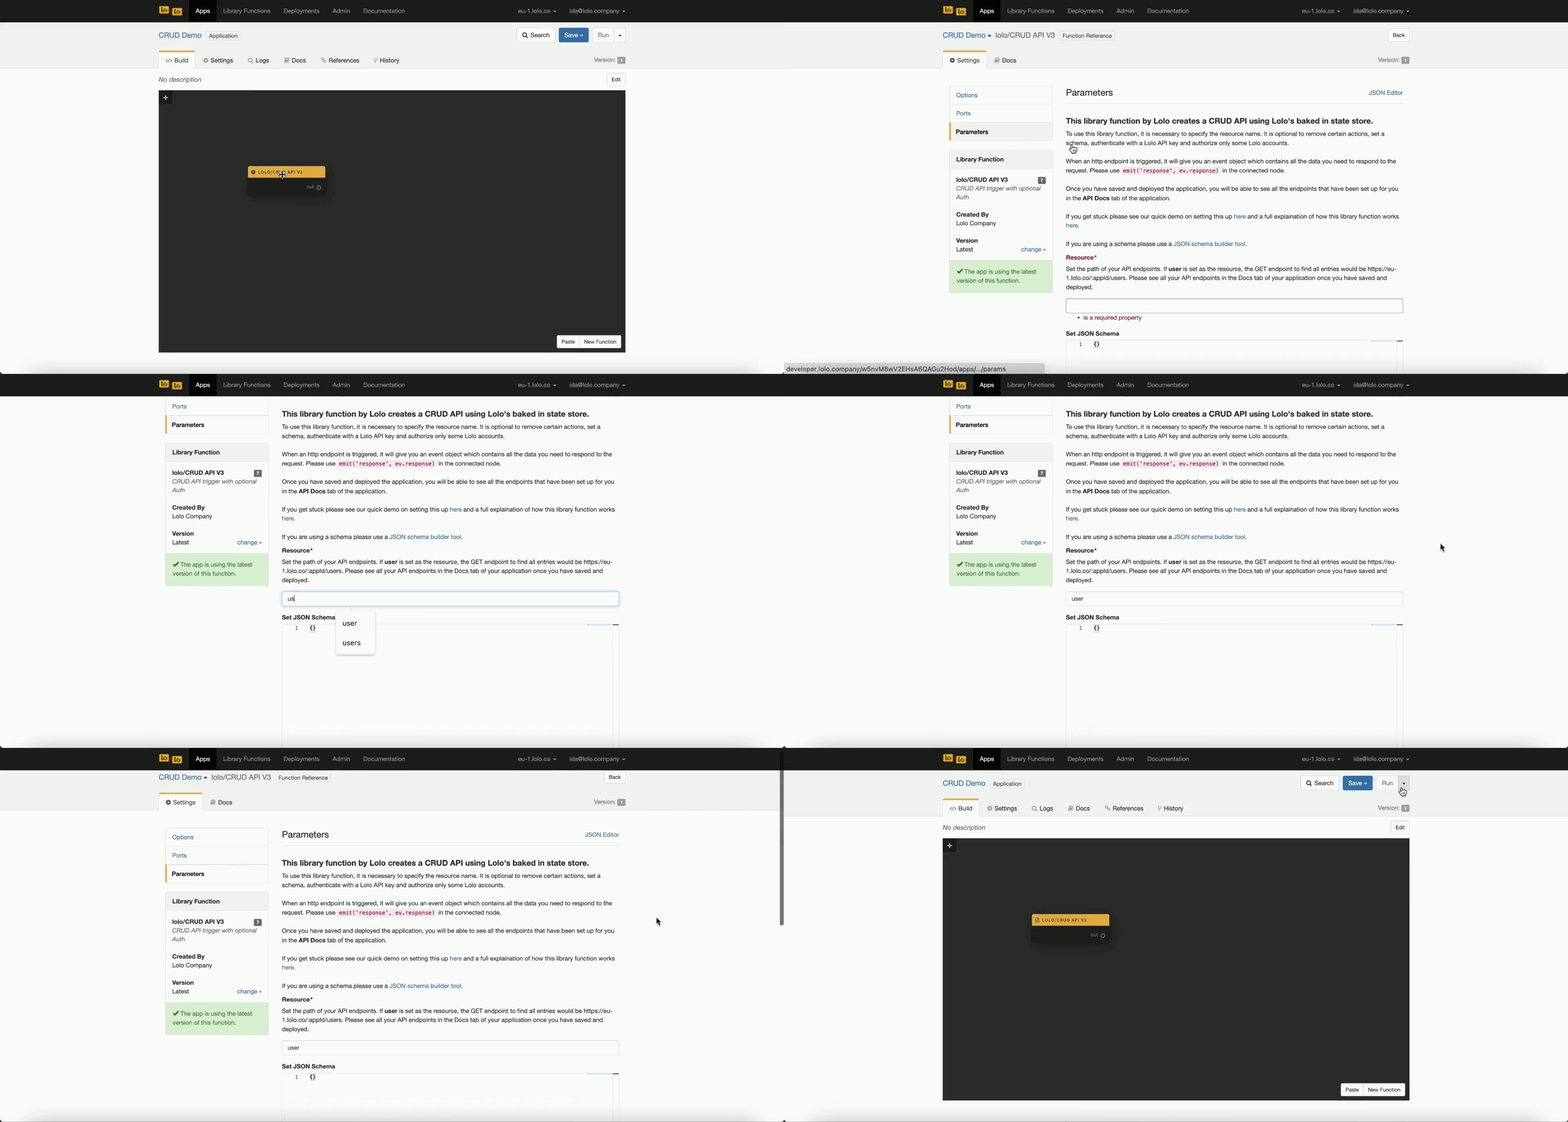
We need to click on this function to configure it. You have to set the resource name but everything else is optional. You'll be able to find options such as setting a JSON schema, removing actions, adding authentication and authorization.
It's up to you what name you want to set as your resource name. If user is set as the resource, the GET endpoint to find all entries would be https://eu-1.lolo.co/:appId/users. Please see all your API endpoints though in the Docs tab of your application once you have saved and deployed.
Send Back a Response
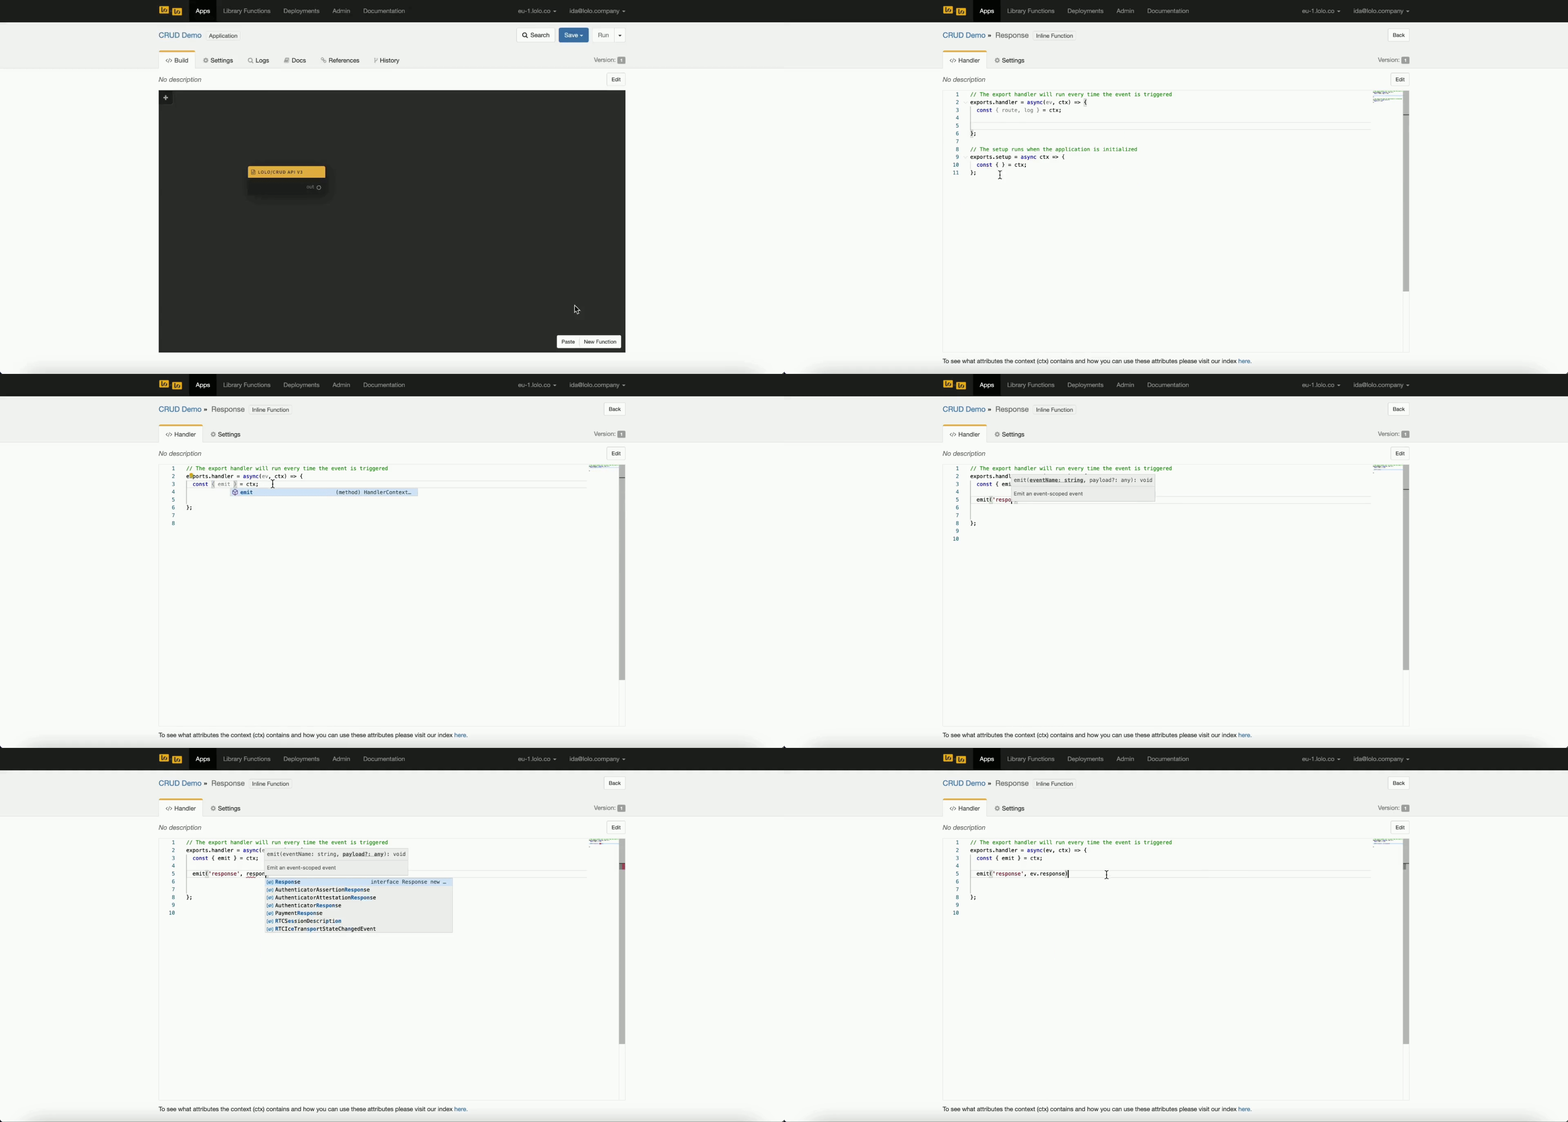
Now we need to create a new function by clicking on New Function in the bottom right of the graph.
When an http endpoint is triggered, it will give you an event object which contains all the data you need to respond to the request. We need to make sure we send back the correct data. So, we need to add some code in our new custom function for this library function to work properly.
The only thing we need here is to send back is the ev.response that has been prepared for us.
exports.handler = async(ev, ctx) => {
  const { emit } = ctx;

  emit('response', ev.response);
};
See the demonstration below on how to navigate into the new function and paste in the code block you see above here.
Connect the Nodes and Deploy
Remember to connect the two nodes together by dragging the out port from the lolo/CRUD API v3 to the in port in your new function so data can flow from one to the other when the CRUD endpoints are called.
Save and Run the application.
Now we wait a minute or two for this application to deploy. It has dependencies that will slow down deployment time here so don't be concerned if it doesn't work right away.
Look in the Logs for a Listen on port 4000 when a minute or two has passed. This means it has been deployed and you can start using it.
Try your Endpoints
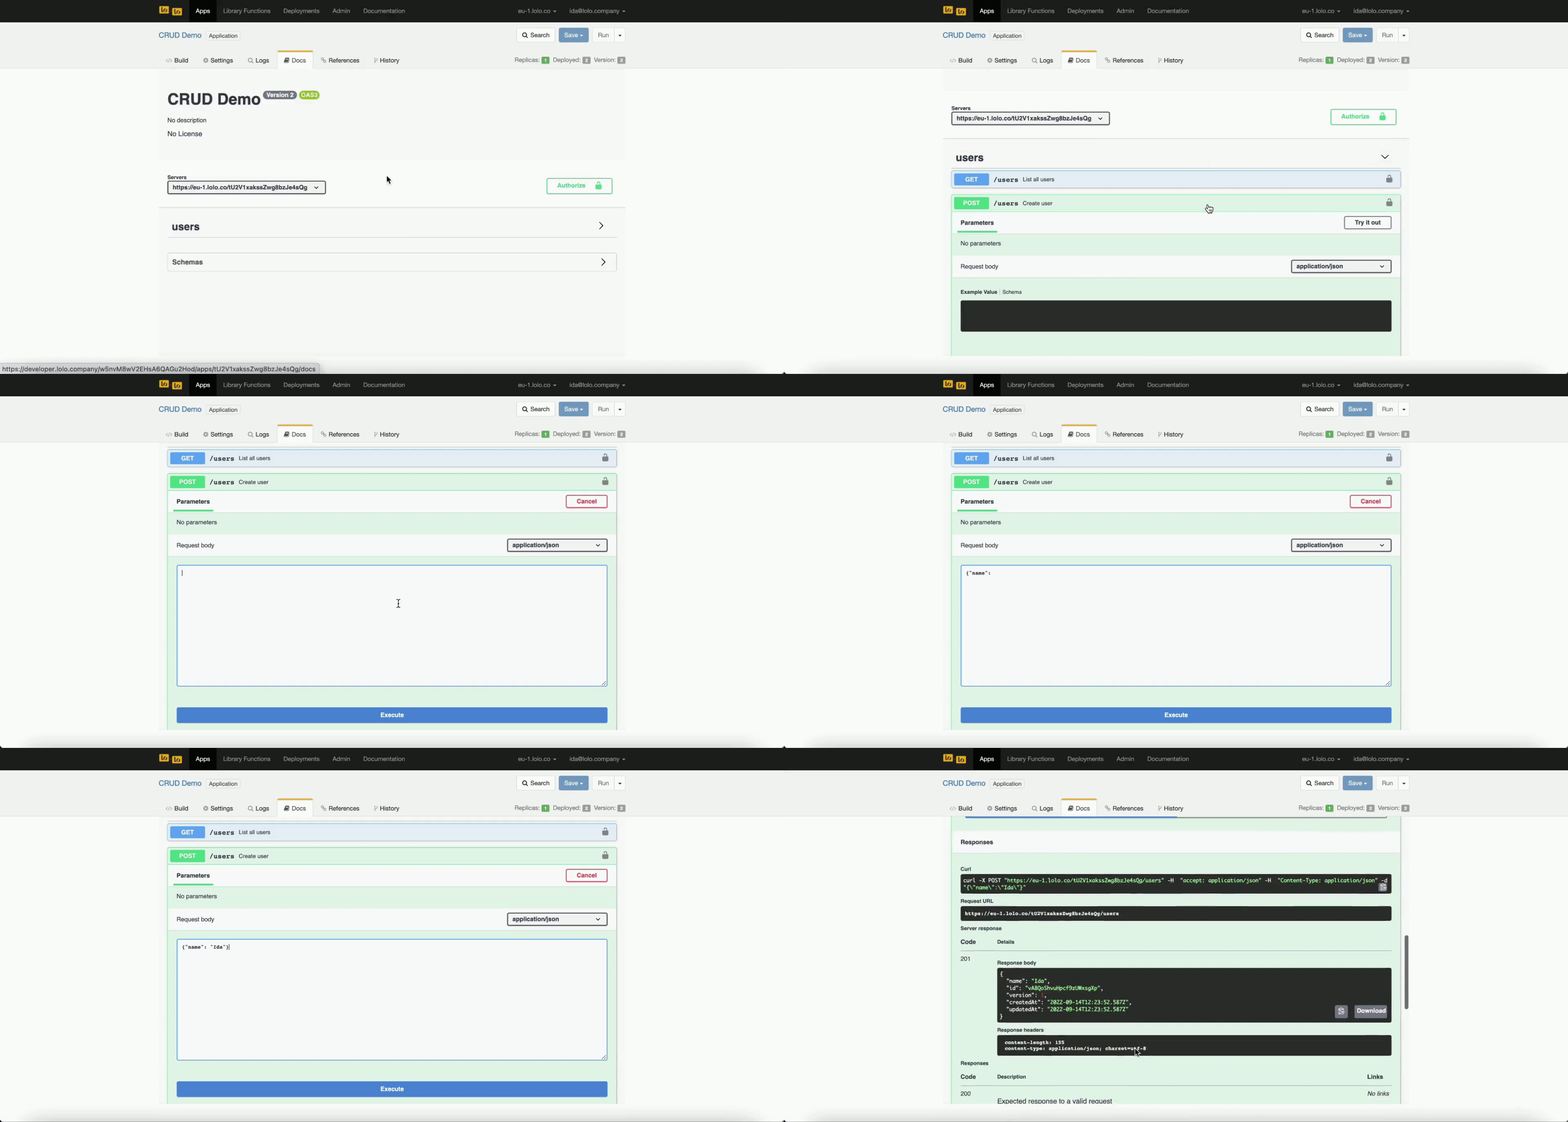
Navigate to Docs to find your API documentation and thus your API endpoints. These won't be visible if you haven't saved and deployed first. This is not a mock environment.
We've configured this without a JSON schema so you can set your JSON data as you want here when you try out your POST endpoint.
YouTube Video Tutorial
If things are moving too fast and you are getting stuck somewhere please follow this full tutorial on how to work the the lolo/CRUD API v3.
Configuring your API with additional Options
Up until this point we've created a full fledged CRUD API you can use. However, you may want to add a JSON schema as well as authentication. This is possible by going back to the lolo/CRUD API v3 node and adding on some options.
Adding a JSON Schema
To add a JSON schema, navigate back to your Lolo graph and open up the lolo/CRUD API v3 function again. Navigate to the Parameters tab. Under the Resource input you'll have the option of adding a JSON schema.
If you need help to set up your JSON object go to this site for a JSON builder.
Once you have your schema set up you can simply copy and paste the object and insert it under Set JSON Schema in the lolo/CRUD API v3 library function. Save and run your application again. Wait a minute or so until you see confirmation in your logs. Try out your API with the correct JSON structure.
Please see the video below to follow how we do this step by step.
Adding Authentication & Authorization
This last part is using Lolo Authentication to make your API private.
To add in Lolo Auth, navigate back to your Lolo graph and open up the lolo/CRUD API v3 function again. Navigate to the Parameters tab. Scroll down to the bottom of the page where you can see Authentication, choose Lolo API Auth. We are working on providing more Auth providers in the future.
If you save and run from here, you won't be able to call the API without a Lolo-Api-Key in the header.
const options = {
   ...
    headers: {
      ...,
      'Lolo-Api-Key': "your key here",
      ...
    },
    ...
  }
To find an API key, navigate to the Admin section of your Lolo account and then to API Keys to create a new key that will be set to your account.
However, anyone with a Lolo API key can access this API. If you only want some Lolo accounts to access this API, such as only yourself, please add the email(s) of the account(s) that should be granted access under Authorization. Yes, input your own Lolo email in the input under Authorization.
To follow us going through this step by step please look at the tutorial below.
Updated 3 months ago
